![]()
Anamorphic lenses open a new world of creative possibilities for filmmakers like me, but they can also transform still photography.
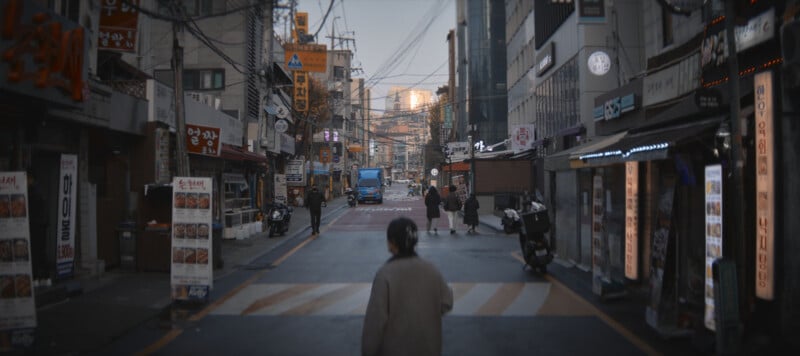
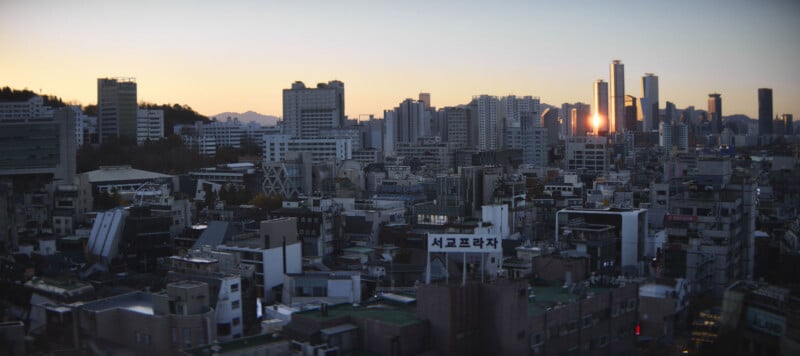
These two photographs, taken seconds apart on the same camera and lens, are uncropped and use the sensor’s full resolution. How’s that possible? Welcome to the wonderful world of anamorphic glass.
![]()
![]()
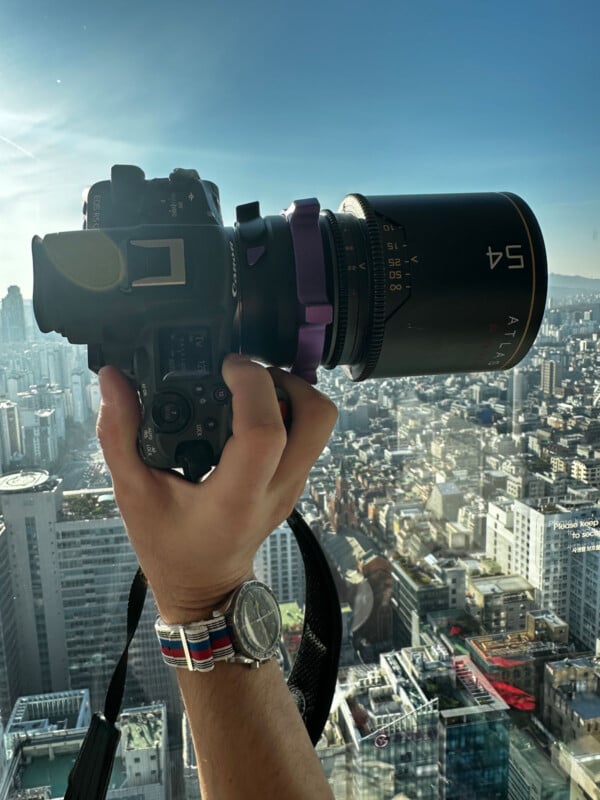
Earlier this year, I was finally allocated a set of five Atlas Mercury lenses after years of waiting. I’m a cinematographer/filmmaker by trade, and I’ve been using them on a new film and for some commercial shoots over the summer. I’ve been impressed with their unique look and versatility on the video side, as they have some unique characteristics you can’t find on traditional spherical glass. They are full-frame 1.5x squeeze anamorphic primes that flare wildly, have that distinct oval bokeh, and are quite fast for this type of cine prime at T2.2. They have a natural vignette on a full-frame sensor, and the wider focal lengths have barrel distortion that’s much more aesthetically pleasing than pincushion, in my opinion.
 One setup, two aspect ratios
![]()
![]()
![]()
A quick background on me: I started in photography after college as a digital tech in the mid-aughts when medium format digital backs began to hit the commercial market. It was an interesting time when old Hasselblad 503s and Mamiya RZ67s were still the fashion and commercial photographer’s weapons of choice (they definitely didn’t play nice with digital). We needed multiple computer towers, sometimes a dedicated server, to accomplish what a single laptop can achieve nowadays.
When the Red One came out, I already had a running start in digital imaging, so I gradually moved into the film world, starting as a DIT and AC before beginning to work as a Director of Photography. I have always enjoyed still photography and even had a side hustle as an aerial photographer in New York City before drones replaced helicopters.
![]()
![]()
![]()
Suffice it to say I have quite a bit of experience with cameras of all varieties, and an iPhone is never the only camera I bring on trips. Sometimes it was a simple point-and-shoot, maybe a film camera (a 503 or Xpan primarily), but usually, it’s a DSLR/Mirrorless in my messenger bag. My wife and I have been wandering around Korea for a few weeks, and I decided to try something different this time.
Days before we departed for Incheon, I was wrapping up a color grade on a short film, and the impetus of this project sprang into my mind. Anyone who has graded in DaVinci Resolve knows that frame grabs are a big part of the process. You save still frames from clips with different grades to overlay using a wipe feature to compare and contrast as well as copy said grades to other clips. This got me thinking about leaning into the still frame aesthetic for this trip and using a Mercury exclusively for still photography while in Korea.
 The setup
This also opened up an interesting format unique to PL mount anamorphic glass. You attach the lens at 90 degrees and utilize the sensor vertically while keeping the lens oriented horizontally. Atlas calls this “atlas-scope”.
 Same shot, same camera, different images
![]()
![]()
![]()
![]()
![]()
I am far from the first person to attempt shooting stills in anamorphic or shooting atlas scope, but I did find the process somewhat challenging, and I think the images it created were interesting. There also isn’t a ton of info out there about using it as a stills medium.
There are practical concerns to consider. These lenses are far from lightweight compared to stills primes (the 95mm lens weighs 4.4 pounds, or about two kilograms), and don’t have features like autofocus or optical image stabilization. Thus I decided to save my back and limit myself to one lens (the 54mm prime) and just shoot with that for the entire trip.
A brief explanation of the technical side of these for those unfamiliar. Anamorphic lenses were initially developed for tank periscopes to give the operator a more expansive view of the battlefield. These lenses were then adapted to 35mm film cameras to utilize more of the super 35 celluloid’s height. Anamorphic lenses squeeze the image by various factors (1.33x, 1.5x, 1.8x, and 2x being the most common). Then, that squeeze is reversed when projecting, yielding the widescreen aspect ratio you see in many films. These days, most stretch it in post digitally when ingesting the footage. They have a distinct oval bokeh, a much shallower depth of field (even on wide focal lengths), and flare with streaks across the frame (if you ever saw J.J. Abrams’ Star Trek, you’ll know what I’m talking about). A ton of films are still shot anamorphically (or in “Scope” for short), and many filmmakers even crop their spherically-lensed films into that familiar 2.39:1 aspect ratio in homage to this format.
![]()
![]()
Taking all that into consideration, I always oriented the lens horizontally to the world as I don’t enjoy the vertical flares and horizontally oval bokeh that shooting it oriented vertically produces. So when I refer to shooting horizontally, that means the camera is in landscape, and vertically means the camera is in portrait. The lens position never changed.
![]()
![]()
![]()
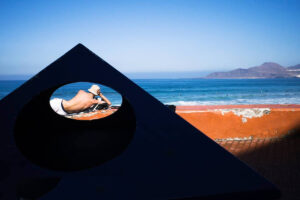
I used a Mofage POCO PL to RF adapter and dropped in a 1/8th strength Black Mist filter to bloom the highlights. I paired this with my Canon R5C. On its 3:2, 45-megapixel sensor, landscape photos yield a 2.25:1 aspect ratio final image, and the portraits are effectively a 1:1 square (just a few pixel lines over in the horizontal side) once desqueezed. Examples of the two final aspect ratios are featured below.
![]()
![]()
This process of shooting is a bit clunky, involves using the magnify feature to check critical focus frequently, constantly switching the lens from properly mounted to 90 degrees, and trying to visualize what the final image will look like since there is no internal desqueeze in the camera’s displays. That being said, you get used to shooting with a squished image very quickly, and desqueezing after the final export often gave me excitement, like getting a forgotten roll of film back from the lab.
Post-processing is no less clunky, and I’m sure there are more effective ways to handle it. I went with Capture One for RAW processing, as I’ve been using it since it was essentially brand-new software (3.7.9 was the best version, and no one can convince me otherwise). After applying the edit, color correction, and preferred look, I exported the selects at full resolution in JPEG.
From there, I found it easier to pop the stills into Resolve, conform all the JPEGs to a 1.5x pixel ratio, make separate timelines for horizontal and vertical images to avoid black bars, and then export all the “clips” as individuals. It’s obnoxious to tweak initially, but the process goes quickly once you have the timelines set. Plus, you can access Resolve’s film emulation engine to further “dehance” your images if that’s your vibe. But to any Capture One developers that might stumble across this, please, please, please add an anamorphic desqueeze function to your software!
![]()
![]()
![]()
![]()
![]()
![]()
Overall, figuring out the quirks of shooting like this was a fun challenge while wandering around Seoul and Busan. The horizontal shots desqueeze to, I hesitate even to say it, “cinematic” landscape images, and the verticals to almost medium format-esque portraits with a tilt shift-like focus falloff. Speaking of focus, the landscape images have that telltale anamorphic subtle soft focus at the top and bottom of the frame, but this effect is much more pronounced in the verticals. It’s essentially a center-focus look, which is unique and something I learned to factor in while framing.
Realistically, attempting to do this as an actual photographic exercise is ridiculous. Cinema lenses are not nearly as sharp as still glass, they are fragile and much heavier, have little to no weather sealing, and feature impossibly long focus throws.
Not to mention that just one Mercury lens costs $8,000. Plus, there is still a long waitlist for new orders. It’s not something accessible or even worth exploring for most photographers.
However, there is a new trend with some of the cheaper cine glass manufacturers, and there are suddenly quite a few budget options in the 1.3x, 1.5x, and 1.8x range. There is even a set of 2x anamorphics for full-frame cameras by Blazar retailing for under $2,000 each. That was unheard of a few years ago, so there is no shortage of options to squeeze away to your heart’s content.
Which leads me to my philosophical disillusion with this project. Why shoot like this? How do you share the widescreen images? Social media platforms shun widescreen images at a fundamental level. Should the landscapes be posted vertically to try and force the viewer to rotate their phone? Stack them three-high as a triptych (they’d still need to be severely cropped)? I can complain forever about the “shoot for both formats” 9:16 vertical crop that has destroyed every well-framed scene in most commercial projects I’ve worked on for the last five years. That has even made shooting video in scope a hard sell for many projects.
When I hand my phone to people in an attempt to share frame grabs of video projects or landscape stills from this Korea trip, folks rarely bother to rotate the phone to landscape and view them in their fullest size available. It bums me out. The widescreen format may be the Betamax of the social media age. Perhaps we’ll start mounting our televisions vertically to the wall so we can watch TikToks from the couch. It’s a vertical world, but I am a horizontal girl.
![]()
![]()
![]()
![]()
![]()
However, many folks here use folding screen phones that are essentially small tablets when open, so that may take off as more manufacturers evolve that technology. A widescreen image looks much better with the doubled screen real estate of those phones.
I also recently demoed the Vision Pro at an Apple Store while waiting on a repair and I do think there may be a future for traditional CinemaScope style content on that platform as well. However, that particular tech is years away from being affordable for the masses and needs to be improved dramatically in the size bat,tery, and, most importantly, design department. Still, seeing these widescreen photos in their entire 45-megapixel, 2.25:1 glory in an emulated gallery setting would be a treat.
Regardless, I like some of the pictures I took on this trip, and for me, that’s always been the enjoyment of photography. Anyone who has taken a picture they’re proud of knows that feeling, and forcing others to enjoy our work in what we deem as its fullest potential is folly. But I think Christopher Nolan would still be appalled at the person in front of me on this train back from Busan watching Oppenheimer on his phone. To each their own.
![]()
![]()
![]()
![]()
![]()
Few things give me more joy than walking the streets of a new city, abroad or domestically, with a camera and taking in the sights and sounds. I don’t think I’ll lug an anamorphic cine lens around on every trip in the future, but I think it paired well with the low-hanging November light and faded color palette that autumnal Korea offered. Shooting in Atlascope also gave me some great ideas for filming future professional projects in that format. This type of experimentation is one of the reasons I still love to partake in still photography as a hobby. Plus, if you’re doing something that doesn’t already have an easy workflow available, I tend to think you’re doing something right. On that note, it’s time to get back to work!
About the author: Taylor is a Brooklyn based filmmaker and cinematographer. After beginning his career in fashion as a digital tech and photo assistant, he moved into film production as an AC and has been working as a DP and Director since 2010. He has filmed on every inhabited continent in over 50 countries. Documentaries are his favorite projects to work on as well as the occasional music video. His hobbies include running marathons, repairing mechanical watches, skiing and anything that involves a passport.
Image credits: All photos © Taylor Scott Mason | website / Instagram


 English (US) ·